CCProxy Advanced Options
Open the advanced options dialog box by selecting "Options -> Advanced". There are 7 tabs in this dialog box.
Dial-up: To configure the dial-up service.
Cascading: To configure the cascading proxy, also called parent proxy, service.
Log: To configure the proxy logging service, i.e. log size, log type, and etc.
Mail: To configure the mail proxy service. You can change the mail proxy port here.
Networks: To configure the proxy network settings such as server IP address binding, socket idle timeout, and etc.
Others: To configure other proxy settings such as interface language, remote admin, and etc.
Dial-up Page
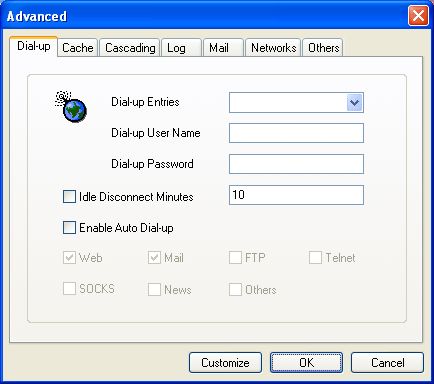
Dial-up Entries: To select dial-up entries
Dial-up User Name: To set the dial-up user name.
Dial-up Password: To set the dial-up password.
Idle Disconnect Minutes: To set the disconnect minutes.
Enable Auto Dial-up: To select which service can be dial-up automatically.
Cascading Page
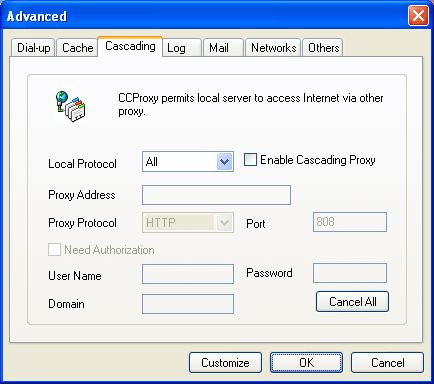
CCProxy supports cascading proxy, also called parent proxy.
Local Protocol: To choose which local protocol will use cascading proxy. For example, if you select "All", all connections from clients will be redirected to the cascading proxy. If you select "WWW", all WWW connections from clients will be redirected to the cascading proxy.
Proxy Address: To set the cascading proxy server address. Both IP address and domain name are acceptable.
Proxy Protocol: To set proxy service protocol that the cascading proxy server provides. If the cascading proxy provides HTTP proxy service, the connections from the client will be translated to the http proxy protocol and redirected to the cascading proxy automatically.
Need Authorization: If the cascading proxy requires authentication, you need to set the authentication information in this zone.
Log Page
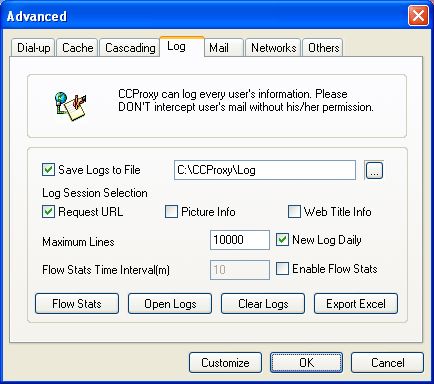
Save Logs to File: To set the log file path.
Request URL: Save the URL access information into logs.
Picture Info: Save the pictures access information into logs.
Web Title Info: Save the HTML title information into logs.
Maximum Lines: To set the maximum lines of the log files.
New Log Daily: Create new log file daily.
Flow Stats Time Interval: To set how often the flow statistics will be saved to the log files.
Enable Flow Stats: Save flow statistics into log files.
Flow Stats: To open the flow statistics log file.
Open Logs: To open the log file.
Export Excel: To export the logs as Excel format.
Mail Page
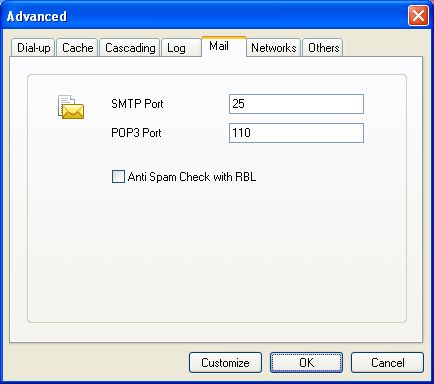
SMTP Port: To set the SMTP proxy service port.
POP3 Port: To set the POP3 proxy service port.
Anti Spam Check with RBL: CCProxy will add [SPAM] signature to the spam email subject. CCProxy will use the RBL to check the spam email. Notes: Only non-SSL POP3 connections can be checked.
Networks Page

Enable SOCKS4: To enable the socks4 and socks4a proxy service.
Disable External Users: To disable the users' access out of the LAN.
Server Bind IP Address: If the server is multiple-hosted, you can use one IP address of them. "0.0.0.0" will select a server IP address automatically.
Bandwidth Control Apply for: To select which direction access will be limited by bandwidth control in the account management.
Web Sites for On-line Checking: To set the web sites that are used to check the Internet connection status.
Socket Idle Disconnect Minutes: To set the socket idle time out value.
Others Page
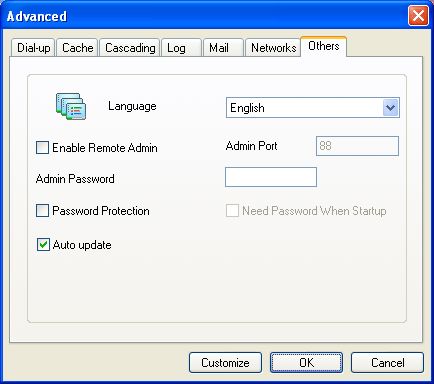
Language: To select the interface language.
Enable Remote Admin: To enable the remote admin service.
Admin Port: To set the remote admin service port.
Admin Password: To set the admin password.
Password Protection: If you checke this option, when you open the account management dialog box, you will need to enter a password to unlock it. If you hide the interface, it will be locked again.
Need Password When Startup: The startup will require a password.
Notes: If you enable remote admin, you can manage the account list via a web browser. For example, If the proxy server address is 192.168.0.1 and the admin port is 88, you can go to http://192.168.0.1:88/ to access account management. When you open this URL, it will require a username and password. If the username is identified with one of the accounts, you can access this details for this account and you can change the account's password. If the username is admin and the password is the admin password, you can change the information for all the accounts and also add or delete an account.
Related: