Introduction of Cache
1.Enable "Cache"
1) Cache here is based on IE technology. You need to install IE version 4.0 or above. To enable this function, please firstly select "Web Cached" check box in "Configuration" dialogue box, then click the "Advanced" button (Figure 1-1).
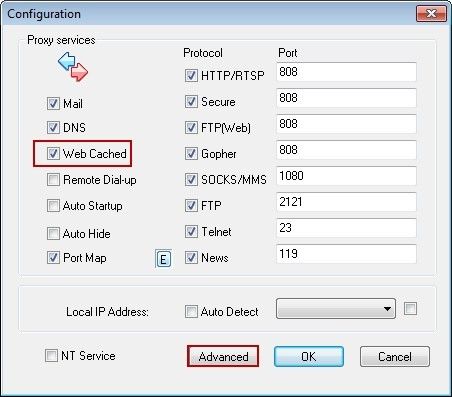
Figure 1‑1
2) In the popped up "Advanced" dialogue box, click the "Cache" tab (Figure 1-2).
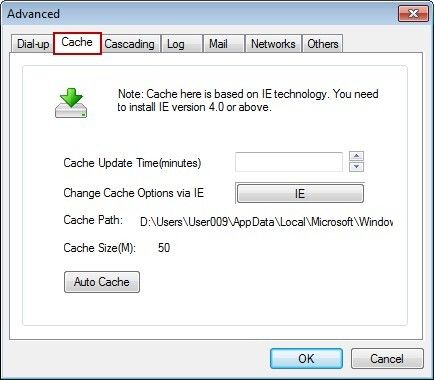
Figure 1‑2
2. Cache Update Time
In "Cache Update Time (minutes)" edit box, type the cache update time. (Figure 1-3) indicates that every 60 minutes, cache update once.
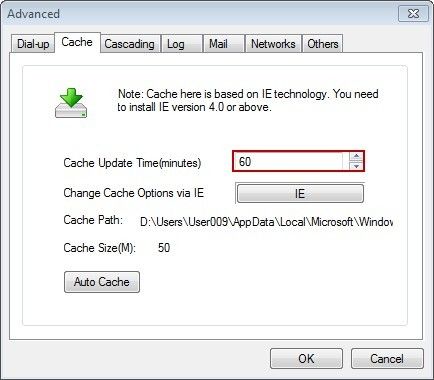
Figure 1‑3
3. Change Cache Options via IE
1) Click the "IE" button (Figure 1-4).
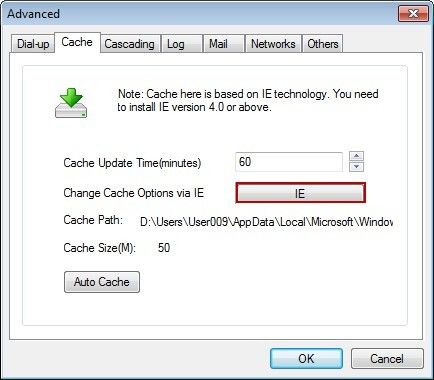
Figure 1‑4
2) The "Internet Options" dialogue box will pop up, in "Browsing history" group, click the "Settings" button (Figure 1-5).
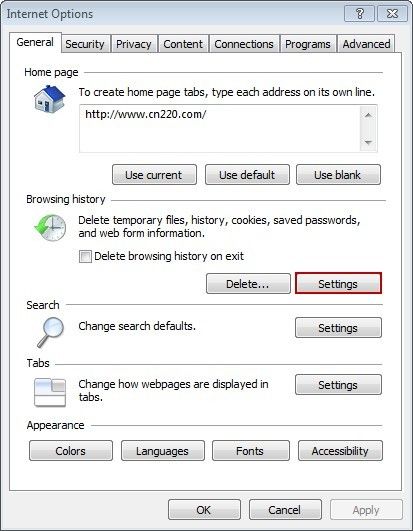
Figure 1‑5
3) The "Temporary Internet Files and History Settings" dialogue box will pop up (Figure 1-6).
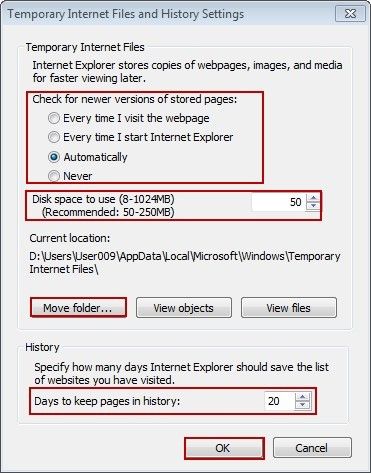
Figure 1-6
Check for newer version of stored pages: To select how to check for newer version of stored pages, so as to make sure the cache stored in the server is the newest version, going with the timely information in the Internet.
Disk space to use: To configure how much space will be used for storing cache.
Move folder: To choose the folder for storing cache files. If Drive C is too small, you can move the data to another drive.
Days to keep pages in history: Configure days to keeping pages in history. Once out of date, it will be deleted automatically by system.
4. Auto Cache
1) Click the "Auto Cache" button (Figure 1-7).
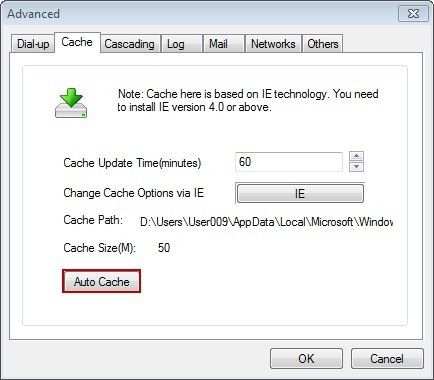
Figure 1-7
2) In the popped up "Auto Cache List" dialogue box, configure the websites that need cache (Figure 1-8).
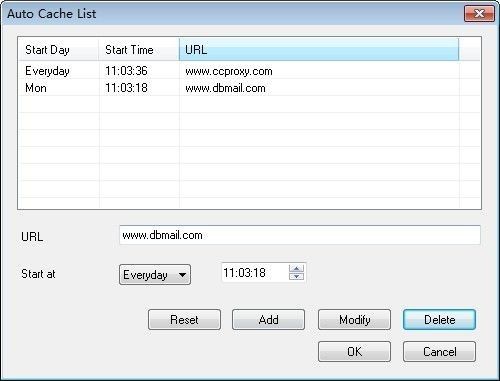
Figure 1-8
The steps of configuring cached websites are as follows:
a. In the "URL" edit box, type the website address (such as www.dbmail.com).
b. Click the "Start at" combo box, select the cache date and time.
c. Click the "Add" button to add a new cache rule.
To cache other websites, please redo the above steps.
Related: