Make Proxy Settings for Mail Clients
Note: Before you configure Outlook, please make sure that the "Auth Type" in CCProxy, Accounts windows is set to "IP Address" or "IP/MAC Address". If you have chosen, "User/Password" outlook will fail to connect to email servers.
Configurations of all mail clients are different, but the principle is still the same. Here set Outlook Express as an example to teach you how to configure them as follows:
1) After launched Outlook Express, click "Tools" button, and then click "Accounts".
2) In the pop up "Internet Accounts" dialogue box, click the "Mail" tab, and then click the "Add" button, select "Mail" (Figure 1-1).
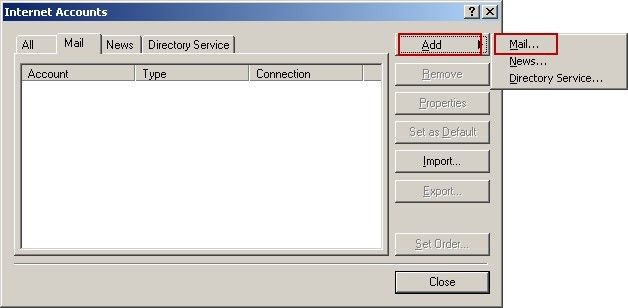
Figure 1‑1
3) In the pop up "Display name" dialogue box, input the name (such as yaozhi), then click the "Next" button (Figure 1-2).
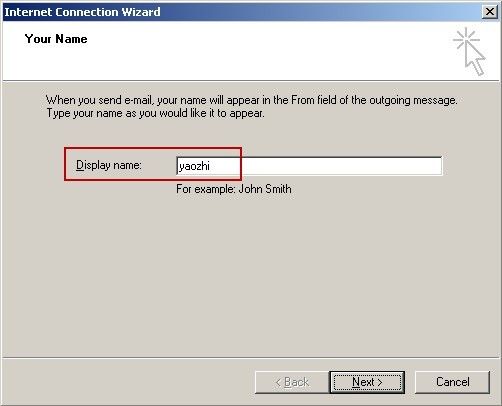
Figure 1‑2
4) In the pop up "Internet Connection Wizard" dialogue box, input your e-mail address, then click the "Next" button (Figure 1-3).
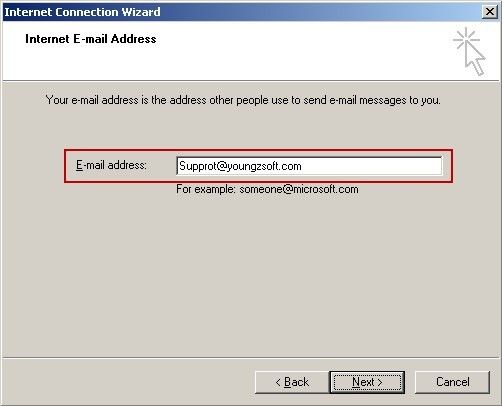
Figure 1‑3
5) In the pop up "E-mail Server Names" dialogue box, select "POP3" as the incoming mail server, in "Incoming mail server" and "Outgoing mail server" edit boxes, type the LAN IP address of the Server (such as 192.168.1.1), then click the "Next" button (Figure 1-4).

Figure 1‑4
6) In the pop up "Internet Mail Logon" dialogue box, input the complete account name and password, then click the "Next" button (Figure 1-5).
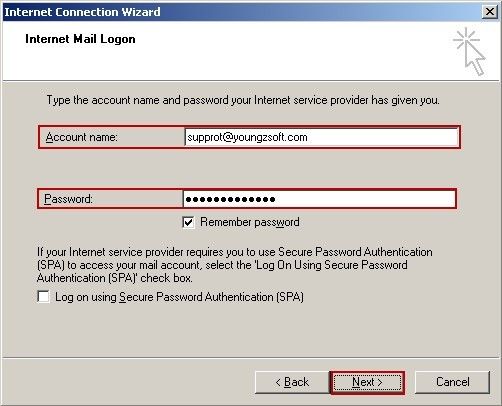
Figure 1‑5
7) Click the "Finish" button to go back to the "Internet Accounts" dialogue box.
8) In the pop up "Internet Accounts" dialogue box, double-click the mail account created just now (such as 192.168.1.1)(Figure 1-6).
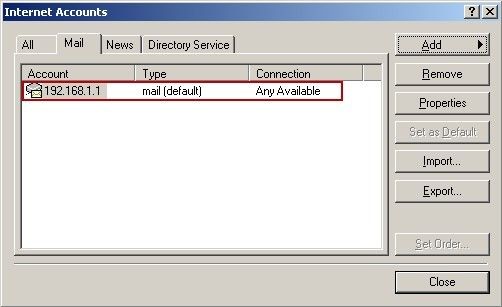
Figure 1‑6
9) In the pop up "mail.youngsoft.com Properties" dialogue box, in "Mail Account" and "Name" edit boxes input the names, in the "E-mail address" edit box input the complete e-mail address (such as support@youngzsoft.com), and then click the "Servers" tab (Figure 1-7).
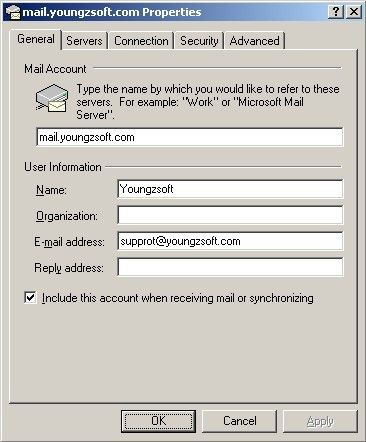
Figure 1‑7
10) In the pop up "mail.youngzsoft.com" dialogue box, modify the account name of "Incoming Mail Server", it should be: account name + "#" + incoming mail server address, then select the "My server requires authentication" check box, then click the "Settings" button (Figure 1-8).
Notes:
Different mail accounts have different pop3 and smtp addresses. Here are some frequently used pop3 and smtp address:
QQ Mail
pop3 Address: pop.qq.com
smtp Address: smtp.qq.com
163 Mail
pop3 Address: pop.163.com
smtp Address: smtp.163.com
Sina Mail
pop3 Address: pop.sina.com
smtp Address: smtp.sina.com
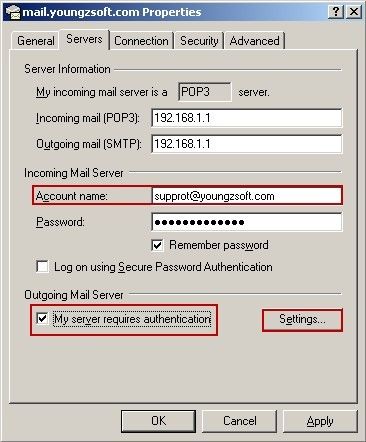
Figure 1‑8
If your pop3 address is "mail.test.com" and account is "user" when you receive/send e-mails on the website, you should input "user#mail.test.com".
If your pop3 address is "pop3.test.com" and account is "user@test.com" when you receive/send e-mails on the website, you should input "user@test.com#pop3.test.com".
11) The configuration rules of outgoing mail server is almost the same with the incoming mail server, you just need to notice that you should input the smtp server address behind "#", such as "smtp.domain.com", "main.domain.com" (Figure 1-9).
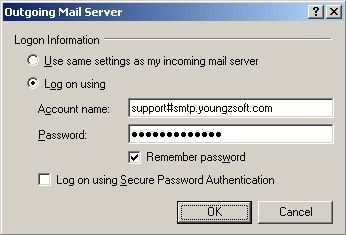
Figure 1‑9
If your smtp address is "mail.test.com" and account is "user" when you receive/send e-mails on the website, you should input "user#mail.test.com".
If your smtp address is "smtp.test.com" and account is "user@test.com" when you receive/send e-mails on the website, you should input "user@test.com#smtp.test.com".
12) After the configuration is done, click the "Send/Recv" button to test whether outlook express could send/receive e-mails or not (Figure 1-10).

Figure 1‑10
Related: