Configure Mail Proxy in Office Outlook for Free Mail
Note: Before you configure Outlook, please make sure that the "Auth Type" in CCProxy, Accounts windows is set to "IP Address" or "IP/MAC Address". If you have chosen, "User/Password" outlook will fail to connect to email servers.
Suppose your mail account information is -
Email address: testuser@ccproxy.com login user name(account): testuser
login password: poppw
pop3 server address(incoming server address): pop3.ccproxy.com
smtp server address(outcoming server address): smtp.ccproxy.com
smtp login user name: testusersmtp (most time it's the same as pop3 login user name, let's say they are different in this case)
smtp login password: smtppw (most time it's the same as pop3 login password, let's say they are different in this case)
Suppose your proxy address is 192.168.1.250
You need to change your mail account information in your Outlook as:
login user name(account): testuser#pop3.ccproxy.com
login password: poppw
pop3 server address(incoming server address): 192.168.1.250
smtp server address(outcoming server address): 192.168.1.250
smtp login user: testusersmtp#smtp.ccproxy.com
smtp login password: smtppw
Notes: if you are using office 2002 or office XP, you need install office sp1 first.
Bellow are screenshots of how to make proxy settings in Office Outlook 2007.
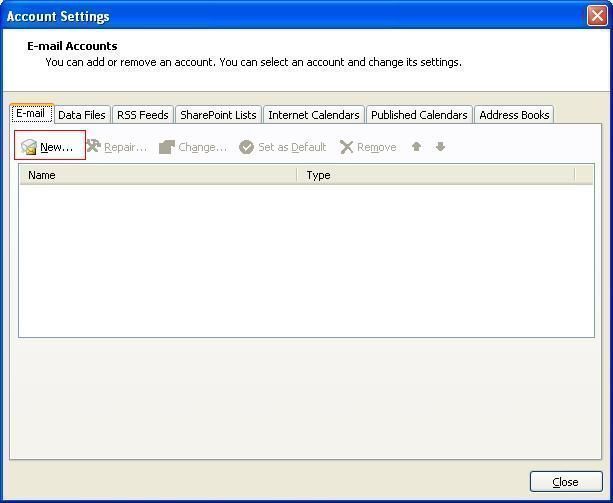
1. "Tools" -> "Account Settings" to open "Account Settings" window, and then click the "New" button as Figure 1.
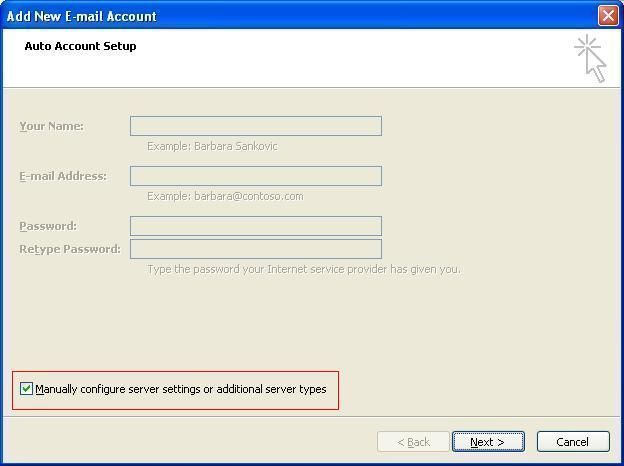
2. In the pop up "Auto Account Setup" dialog box, select the "Manually configure server settings or additional server types" check box, then click the "Next" button as Figure 2.
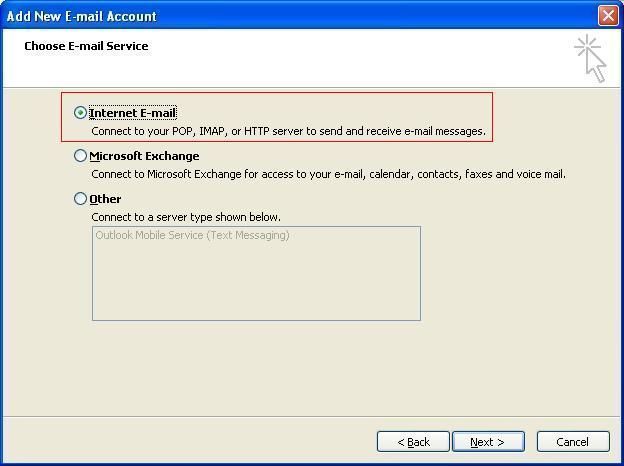
3. In the pop up "Choose E-mail Service" dialog box, select the "Internet E-mail" radio button, then click the "Next" button (Figure 3).
4. In the pop up "Internet E-mail Settings" dialog box, click the "More Settings" button as Figure 4.

5. In the "Internet E-mail Settings" dialog box, click the "Outgoing Server" tab, then configure as Figure 5.
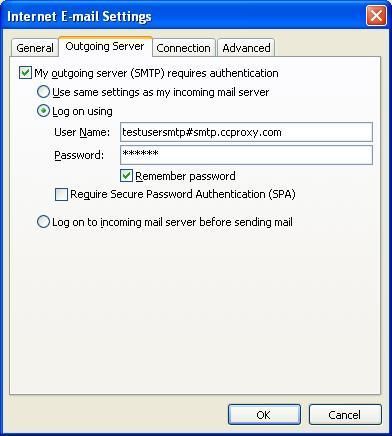
6. In the "Internet E-mail Settings" dialog box (Figure 5), click "OK" to save settings and back to dialog box as Figure 4. Then click "Next" to finish.
Related: