Proxy Settings for Domain Users
Domain users authentication is a newly-added powerful function, which can be used for scanning all the domain accounts and passwords, especially, you can add accounts by domain group. Besides, domain users and password could be updated synchronously.
1. Configuration of Proxy Server
Note: First you should install CCProxy on the domain server or domain client pc with administrator authority.
1) Run CCProxy and click the "Account" button in the tool bar (Figure 1-1).
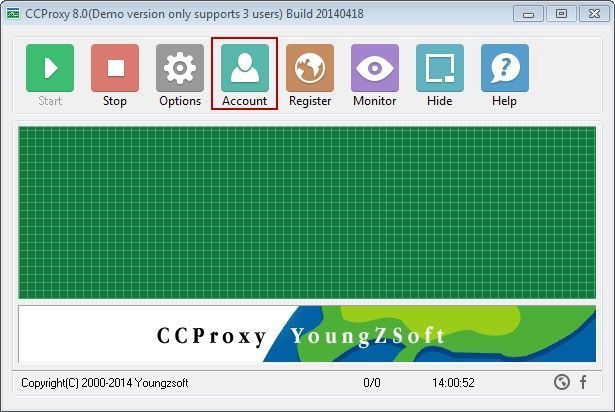
Figure 1-1
2) Check "Domain User Auth" and click the "Domain" button in the pop-up "Account Manager" form (Figure 1-2).
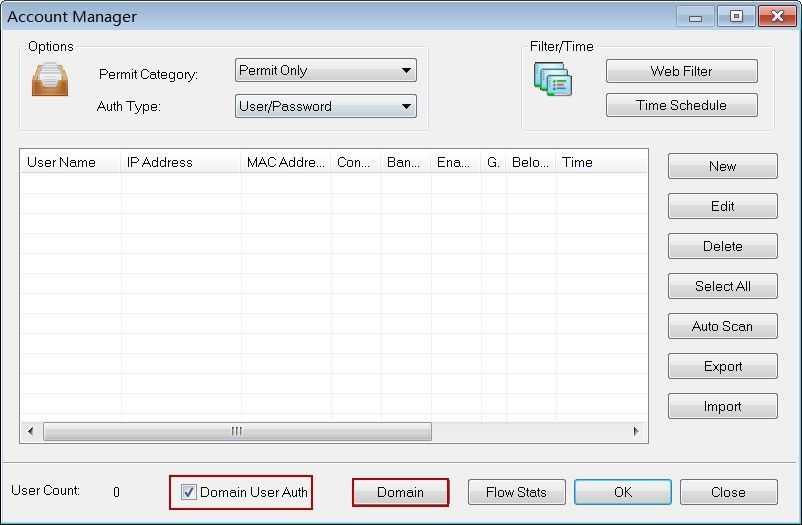
Figure 1-2
3) Edit the “Domain name” and click the “Get user list” button in the pop-up "Domain Options" dialog box, then press the "OK" button (Figure 1-3).
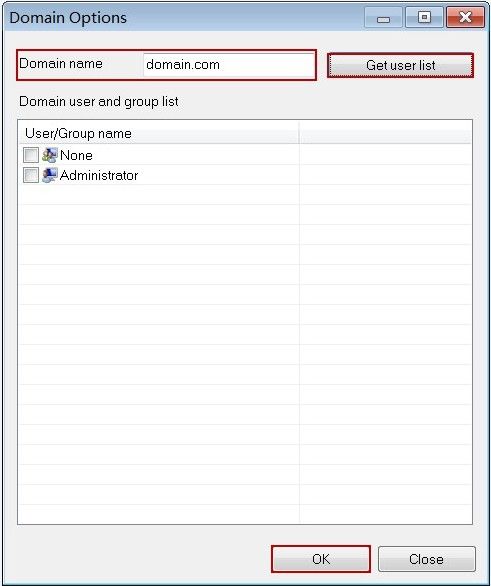
Figure 1-3
Note: If CCProxy is installed on domain server, you should enter "." in the "Domain name".
4) All the "domain accounts" can be scanned out in the "Domain user and group list" (Figure 1-4).
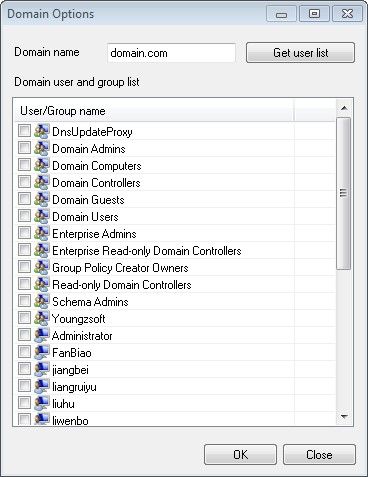
Figure 1-4
2. Add Domain Accounts
1) Select the group (Sign [1]) and users (Sign [2]) from the "Domain user and group list" details pane in which all the accounts on the Active Directory can be found, and press the "OK" button (Figure 1-5).
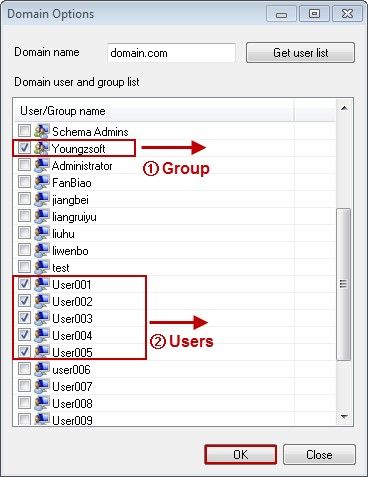
Figure 1-5
2) The domain group (Sign [1]) and users (Sign [2]) that you selected are added into the account list (Figure 1-6), then all the users in this domain group and other users that you add can access to Internet by CCProxy.
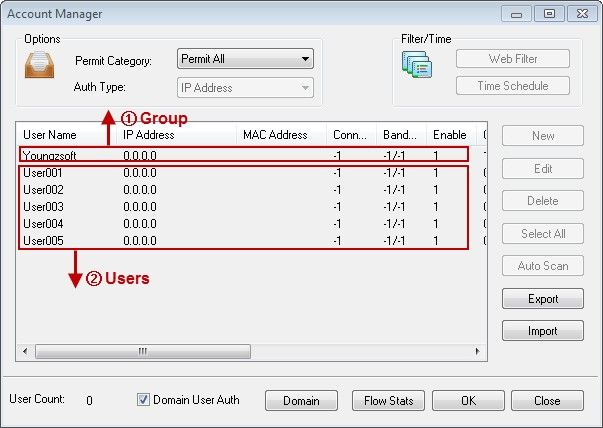
Figure 1-6
Notes:
1. You only have to make sure the user belongs to the group on domain server, and this group is added into CCProxy, then the user can access to the Internet.
2. CCProxy only reads the domain user at startup. So, if you enabled in CCProxy NT Service, please execute the command on CMD: C:\Program Files\CCProxy\CCProxy.exe" -update
Or, just restart the CCProxy service.
3. Configuration of Domain Server
1) Click the "Start" button, input "gpmc.msc" in "Run" edit box, then press the "Enter" key.
2) In the pop up "Group Policy Management" window, click "Forest: domain.com" and expand it, navigate to "Domains" -> "domain.com" -> "Default Domain Policy", right click "Default Domain Policy" and select "Edit...".
3) Click the "User Configuration" node to expand the tree, navigate to "Policies", "Windows Settings", "Internet Explorer Maintenance" and "Connection", on the right side of the window double-click "Proxy Settings" (Figure 1-7).
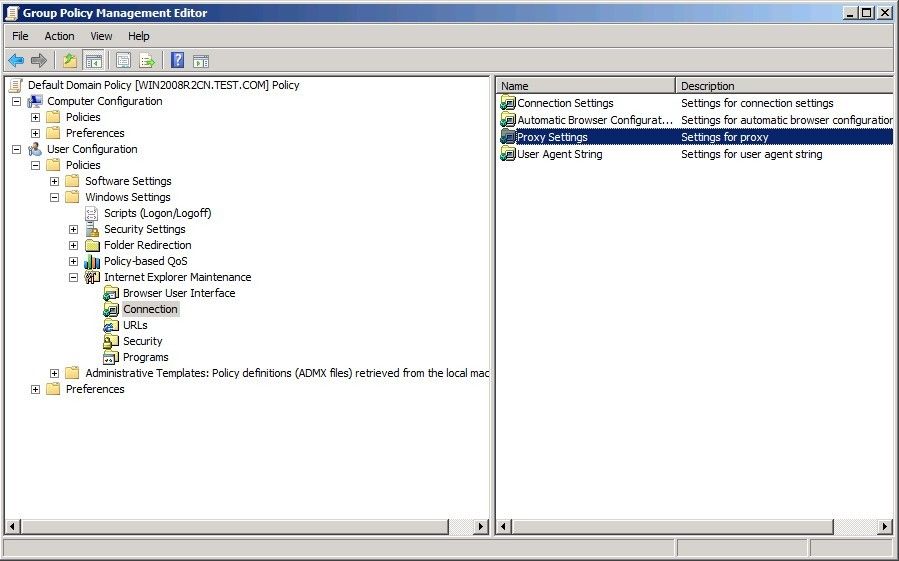
Figure 1‑7
4) In the pop up "Proxy Settings" dialogue box, select the "Enable proxy settings" check box, type the IP address and port of the proxy server both in "Address of proxy" and "Port" edit boxes, then click the "OK" button (Figure 1-8).
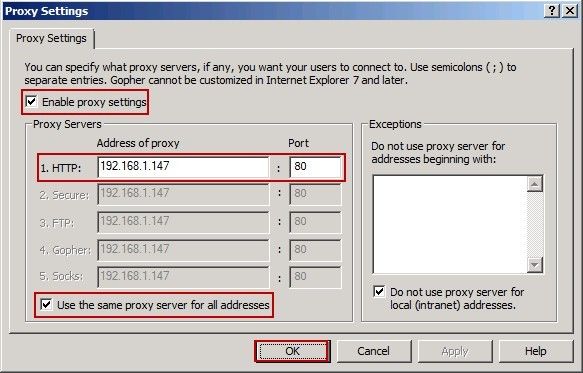
Figure 1‑8
4. Configuration of Domain Clients
4.1 Proxy Settings for Domain Clients
After made "proxy server settings" and "domain server configuration", the IE browser in domain clients do not need to make proxy settings again. Accessing the Internet could be done by domain accounts, but it only works for IE. However, as many softwares access the Internet via IE' proxy, you do not need to make proxy settings for them.
Some softwares could detect the system proxy of domain automatically. You could choose the system proxy settings to get away from making proxy settings for them.
4.2 Mail Proxy Settings for Domain Clients
Because Outlook don't support domain and auth type of user/password, the mail proxy settings for domain clients, please refer to this link.
Related: