Steps for Configuring Microsoft Outlook 2013
Note: Before you configure Outlook, please make sure that the "Auth Type" in CCProxy, Accounts windows is set to "IP Address" or "IP/MAC Address". If you have chosen, "User/Password" outlook will fail to connect to email servers.
Test result shows that CCProxy 7.3 (2013.06.19 or after) supports working with Microsoft Outlook 2013. Please follow the configuration steps below.
1) Install Microsoft Outlook 2013 on the client PC, and then run the program.
2) In the "Add an Email Account" dialog box, select the "Yes" radio button. And then, click the "Next" button (Figure 1-1).

Figure 1-1
3) In the pop up "Auto Account Setup" dialog box, select the "Manual setup or additional server types" radio button, and then click the "Next" button (Figure 1-2).
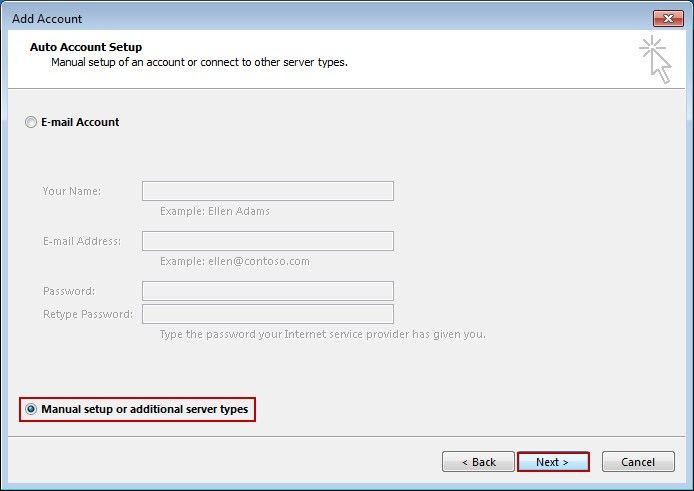
Figure 1-2
4) In the pop up "Choose Service" dialog box, select the "POP or IMAP" radio button, and then click the "Next" button (Figure 1-3).
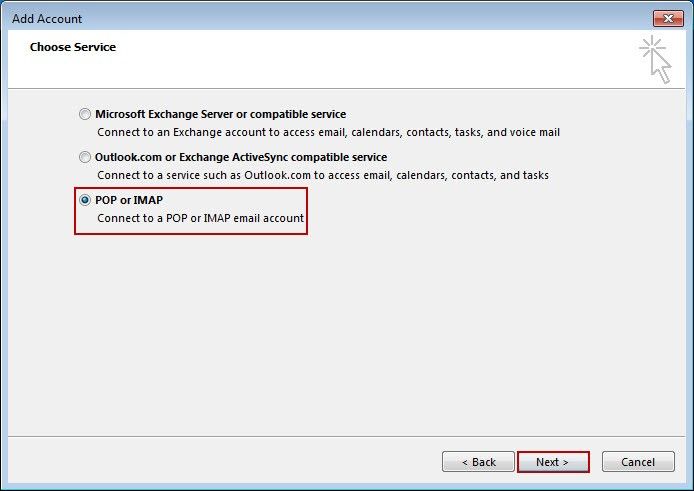
Figure 1-3
5) In the pop up "POP and IMAP Account Settings" dialog box, input the corresponding information to the "Your Name", "Email Address", "Incoming mail server", “Outgoing mail server (SMTP)”, "User Name" and "Password" edit box. And then click the "More Settings…" button (Figure 1-4).
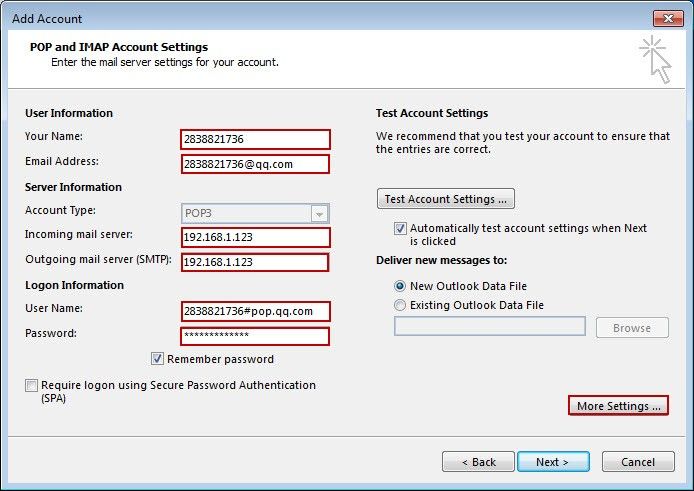
Figure 1-4
Your Name: Your mail account.
Email Address: The full name of your mail address.
Incoming mail server: CCProxy IP address.
Outgoing mail server (SMTP): CCProxy IP address.
User Name: Your mail account + # + incoming mail address.
Password: Your mail password.
6) In the pop up "Internet E-mail Settings" dialog box, click the "Outgoing Server" tab, select the "My outgoing server (SMTP) requires authentication" check box, and then select the "Log on using" radio button. In the "User Name" edit box, type "Your Name + # + Outgoing Mail Address", and type the password into the "Password" edit box. Then, click the "OK" button (Figure 1-5).
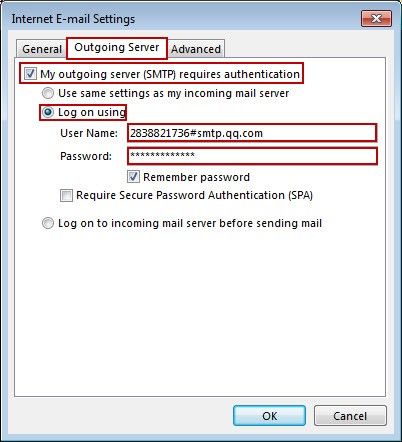
Figure 1-5
7) In the "POP and IMAP Account Settings" dialog box, click the "Test Account Settings" button. Then it will pop up the "Test Account Settings" dialog box. Just wait for the testing result, then you will see all tests completed successfully (Figure 1-6).
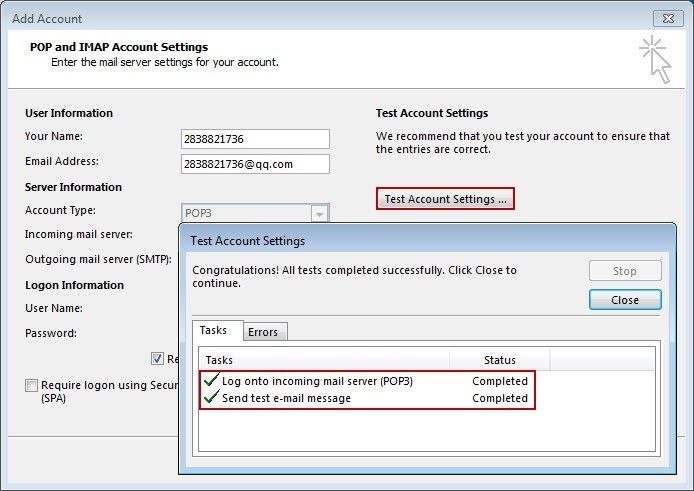
Figure 1-6
Related: