OpenDNS Filter Function in CCProxy
First of all, OpenDNS function has been added since V6.64. You can follow the instructions as below to enable OpenDNS filter function in CCProxy.
1) Install OpenDNS on the same machine with CCProxy installed, register an OpenDNS account and log in. (Figure 1-1).

Figure 1-1
2) Open CCProxy main interface-> click the "Account" button-> click the "web filter" -> input the OpenDNS address behind "Advanced DNS Filter"-> press the "Save" button and "OK" button (Figure 1-2).
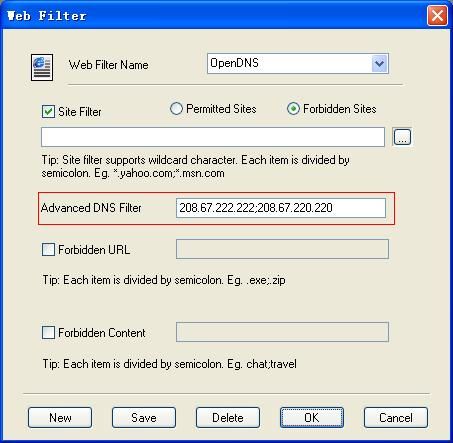
Figure 1-2
Note: Multiple addresses should be divided by semicolon, for example: "208.67.222.222;208.67.220.220".
3) Go to "login.opendns.com" and sign in (Figure 1-3).
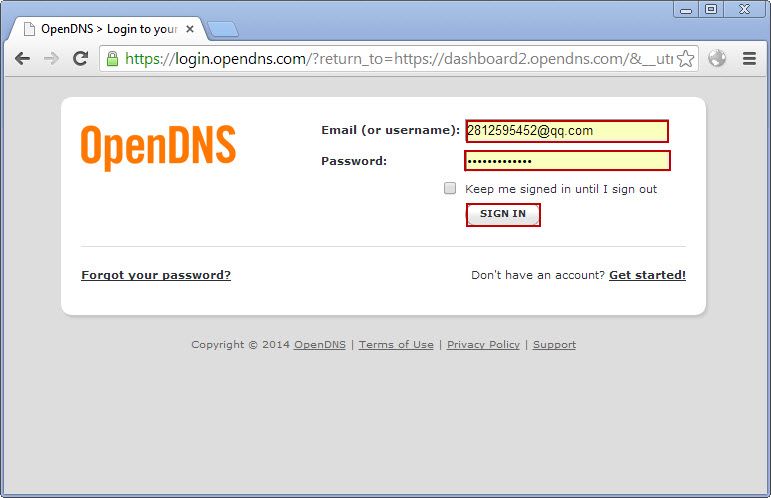
Figure 1-3
4) In the home page of your OpenDNS account, click the "network" under your settings-> select the network address that you want make web filter "office 118.249.100.238" -> click the "web content filtering" (Figure 1-4).
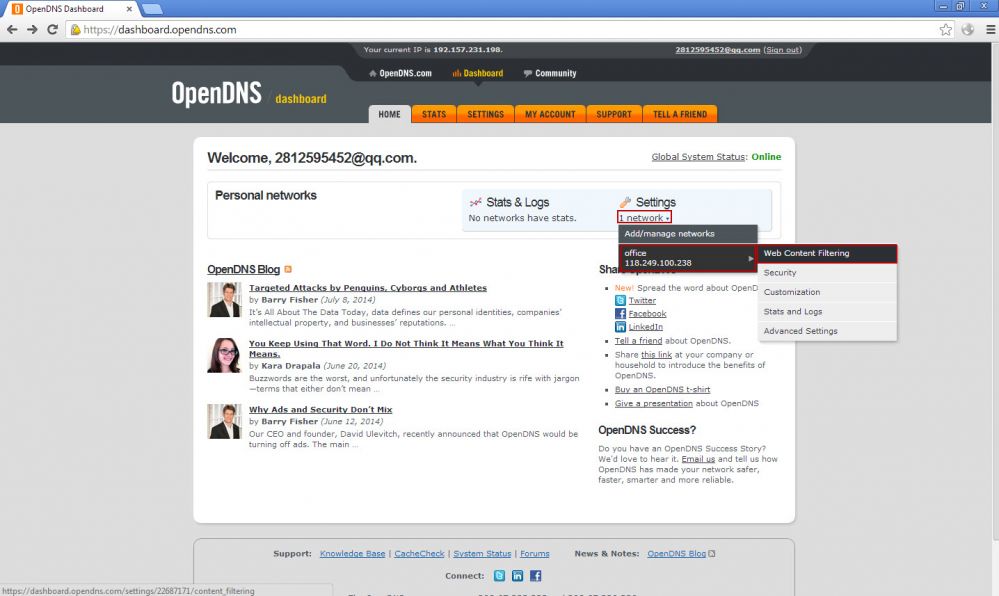
Figure 1-4
5) Pop up a page about the settings of web content filtering, select the "Custom" button-> select "Chat" for example-> press the "Apply" button (Figure 1-5).
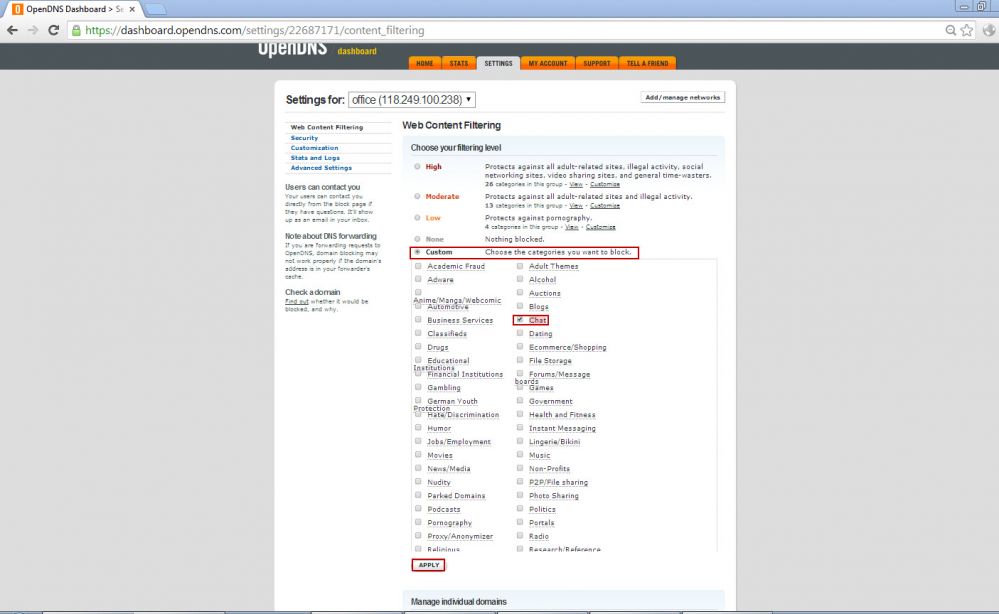
Figure 1-5
6) Back to CCProxy, enable the OpenDNS web filter to the account which you want to limit (Figure 1-6).
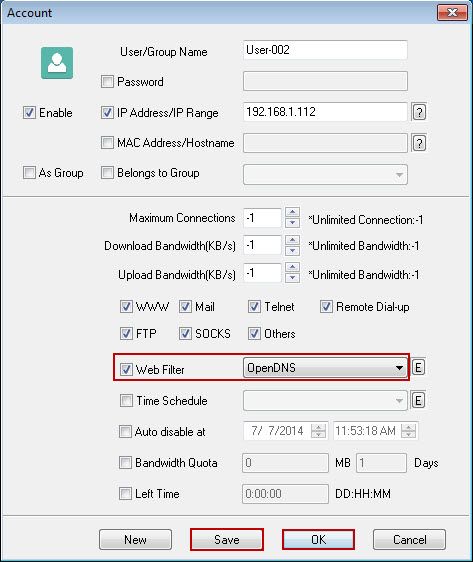
Figure 1-6
7) Visit a chat website on this client, such as "www.skype.com", you'll get the website blocked information (Figure 1-7).
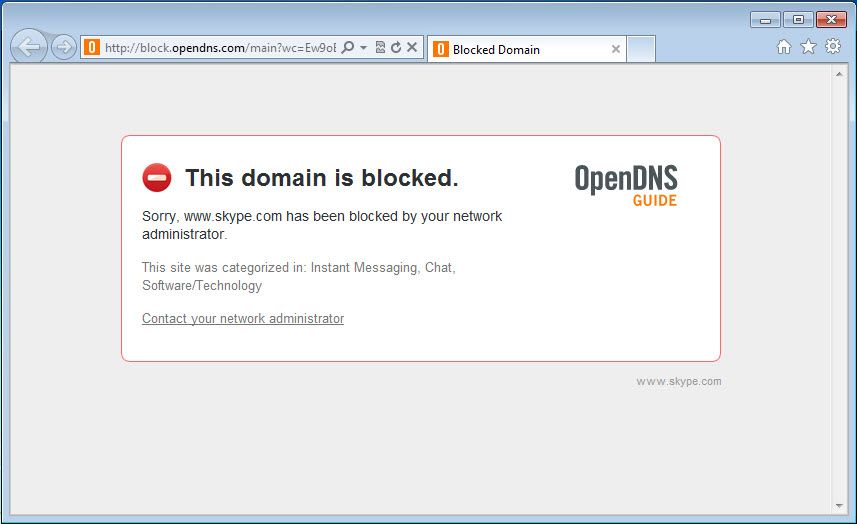
Figure 1-8
Related: