CCProxy Quick Start
CCProxy Server is an easy-to-use and friendly proxy software for Windows operating system including newer Windows 10 and Windows Server 2016.
This is a quick start guide is for beginners who would like to build their own proxy server using CCProxy.
1. Download CCProxy latest version from our website.
Installation CCProxy
2. Once, downloaded, run the setup package (Figure 1).

Figure 1
3. Choose the installation directory and click "Next" button (Figure 2).
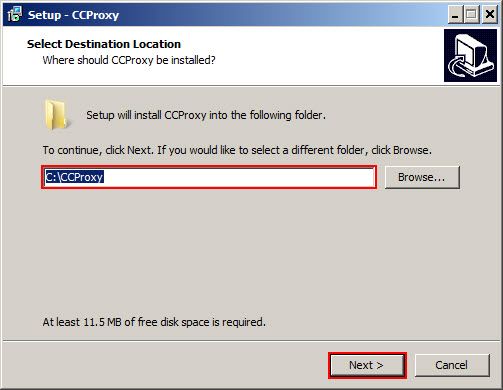
Figure 2
4. Continue to click "Next" button, till you reach "Install" button, click it to start CCProxy installation (Figure 3).
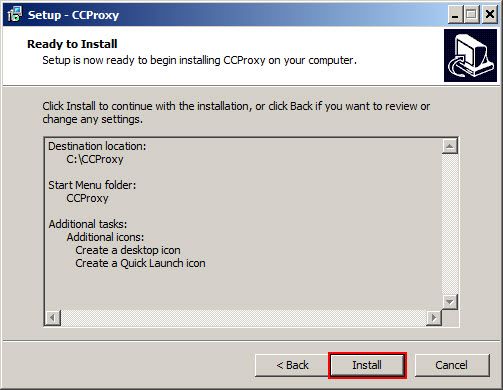
Figure 3
5. Now, at the end of installation, keep the "Launch CCProxy" checkbox checked and click "Finish" button (Figure 4)
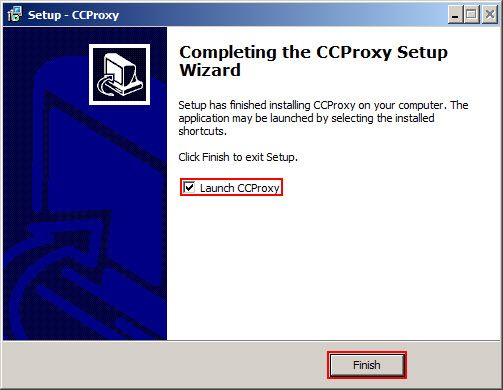
Figure 4
6. CCProxy will launch (Figure 5).
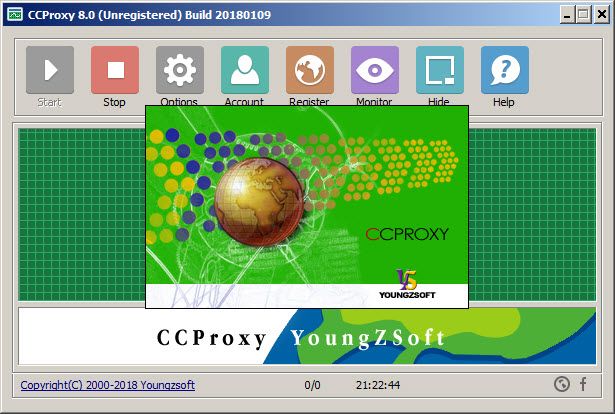
Figure 5
Configuring CCProxy
7. Open, your firewall settings and allow CCProxy in firewall (Figure 6)
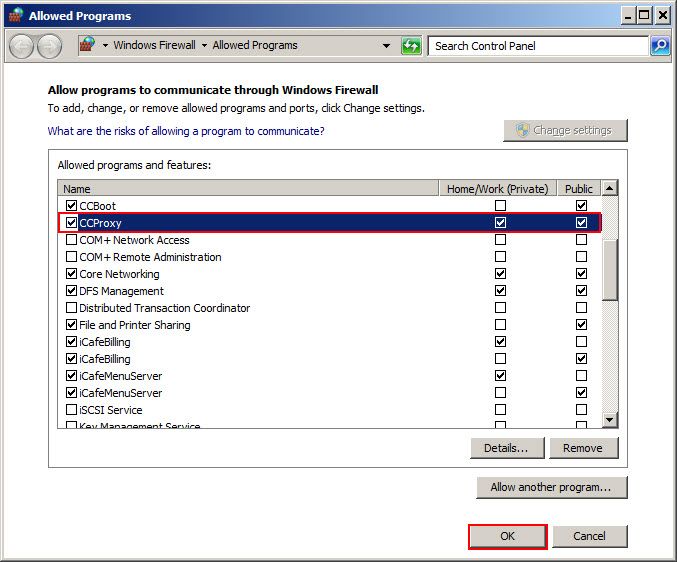
Figure 6
8. After that, Click "Options" button to open "Configuration" window (Figure 7)

Figure 7
9. Leave all options default for ports, then check "NT service" checkbox, and click "OK" button (Figure 8).
Note: By checking "NT Service" checkbox, CCProxy will work even with its UI closed in the background as a service in windows. Otherwise, CCProxy will only work when CCProxy is running on the desktop.

Figure 8
Note: If you change the IP address of CCProxy server then clients will not be able to connect to it unless you change their proxy settings.
10. Furthermore, click "Account" button on the UI to open "Account Manager" window (Figure 9).
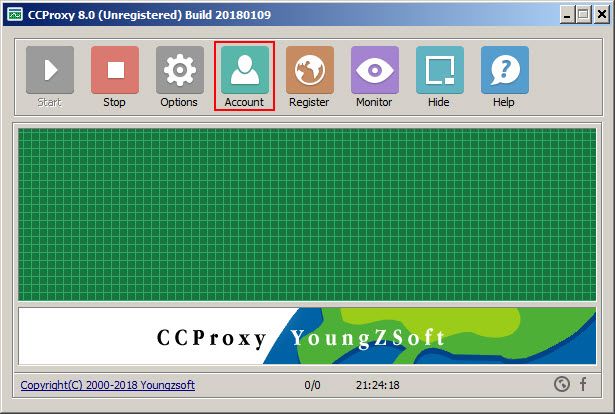
Figure 9
11. On the "Account Manager" windows, click the "Permit Category" drop down and choose "Permit Only" option (Figure 10).
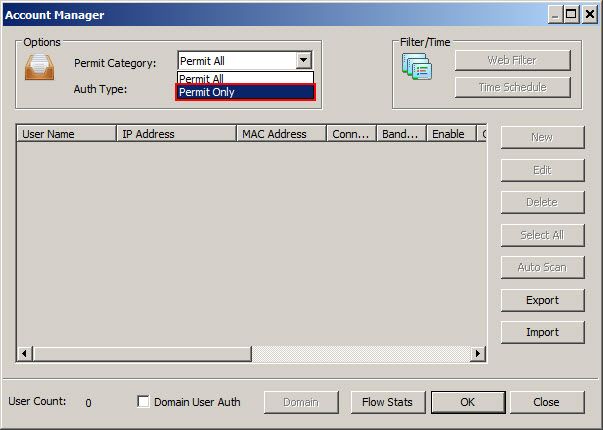
Figure 10
12. Now, click the "Auth Type" drop down and choose "IP Address" and then click "OK" button (Figure 11).
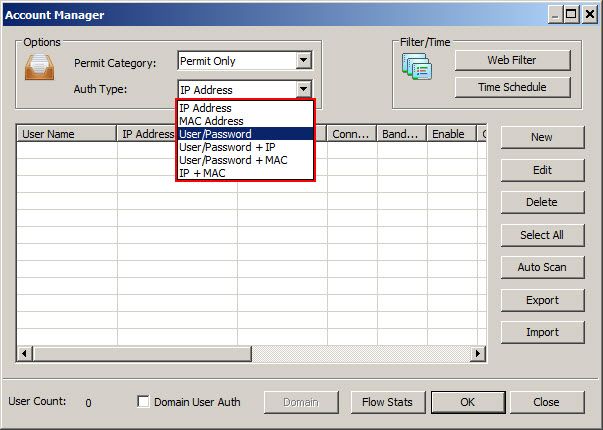
Figure 11
Adding User in CCProxy
13. Now, with "Auth Type" set as IP Address, click "New" button (Figure 12)
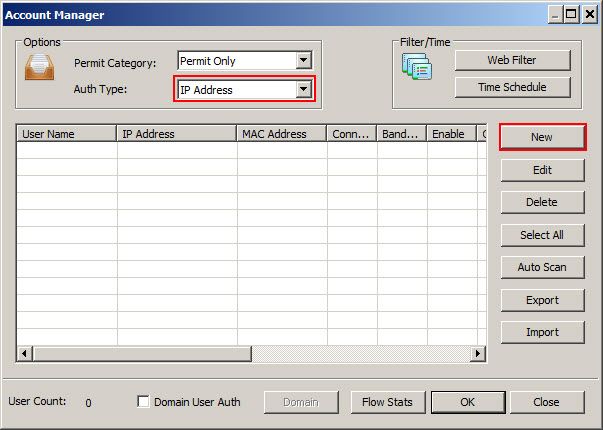
Figure 12
14. On the "Account" window, checl the "IP Address/Range" check box and enter the IP range in your network, then click "OK" button (Figure 13).
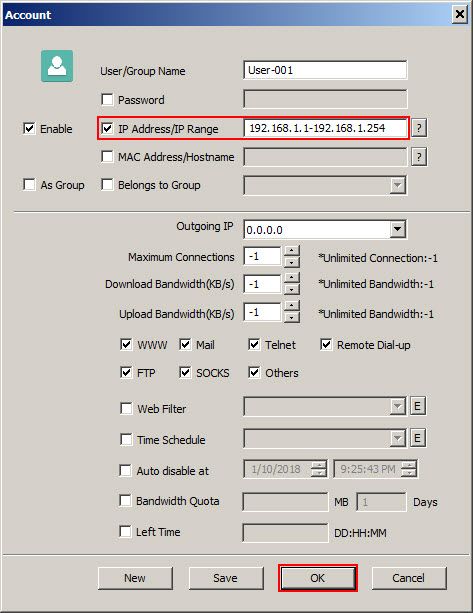
Figure 13
15. The clients in the specified range will be added as a user, click "OK" to save the changes (Figure 14).
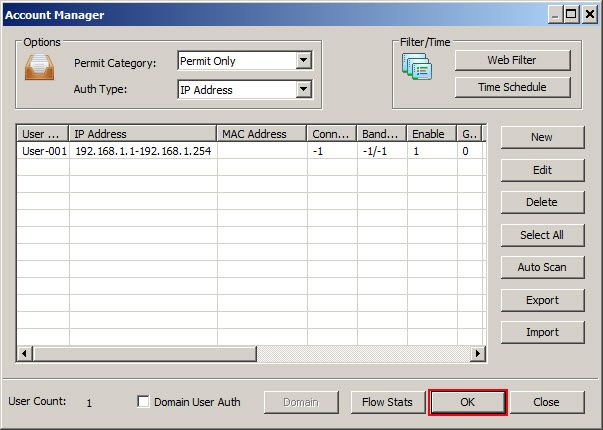
Figure 14
Configuring Client for Access
16. Search for "Internet Option" and open it (Figure 15).
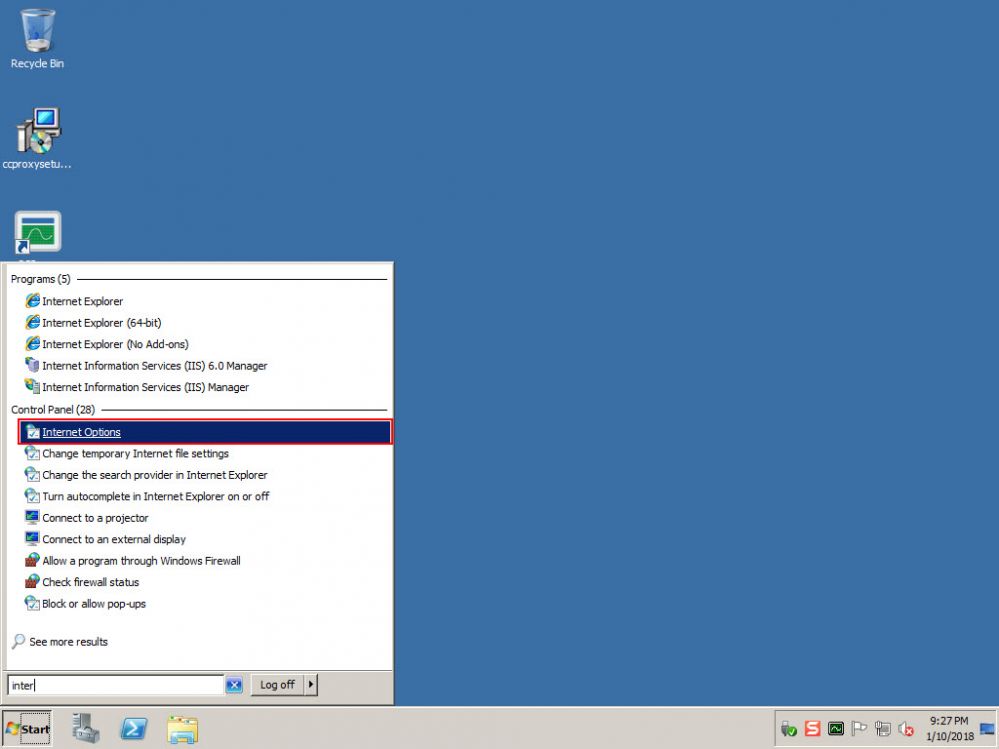
Figure 15
17. On the "Internet Options" window, click on "Connections" tab and then click on "LAN settings" button (Figure 16).
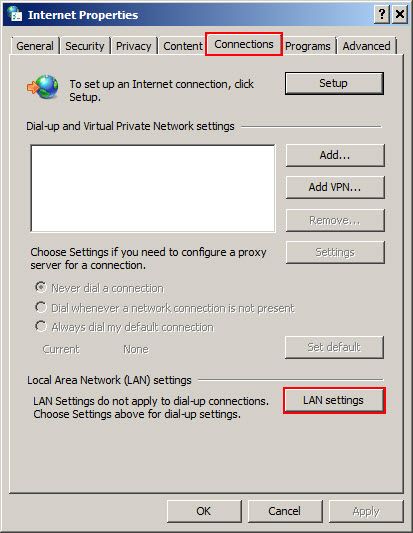
Figure 16
18. Check the "User as proxy server for your LAN" check box and then click "Advanced" button (Figure 17).
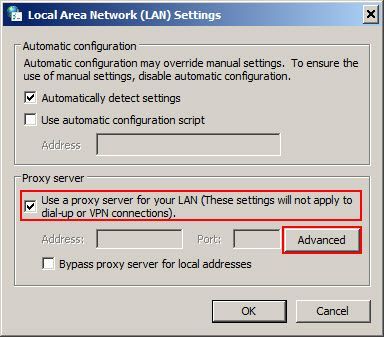
Figure 17
19. Enter the IP and port number respective to what is set in the CCProxy Options window, then click "OK" button (Figure 18)
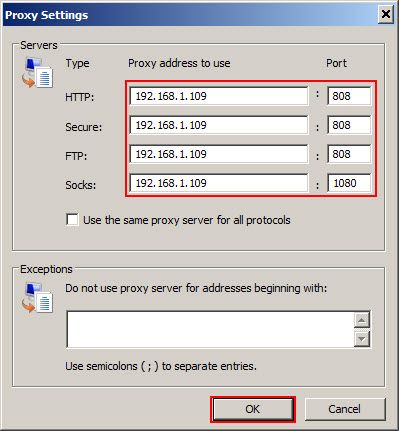
Figure 18
20. Open internet explore or Google Chrome, it will go through CCProxy (Figure 19).

Figure 19
21. You can check if clients are going through CCProxy or not from the "Connection Information" window, opened when you click "Monitor" button on CCProxy UI (Figure 20).
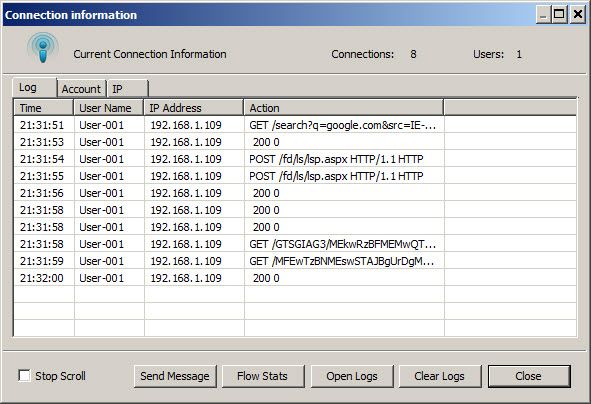
Figure 20
Registering CCProxy
22. To register CCProxy with a serial code (license), click the "Register" button to open "Registration" window (Figure 21)

Figure 21
23. Enter the serial code, you received in email after purchasing CCProxy license, in the "License" field and then click "Register" button (Figure 22)
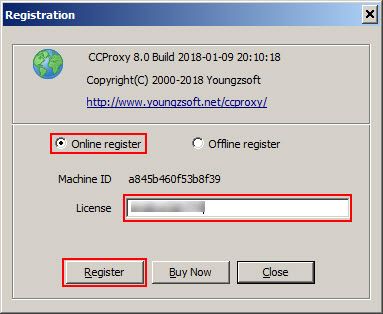
Figure 22
24. A prompt will open "Register OK!" to inform of successful registration of your license in CCProxy.
Related: