Setting up Static IP Address
1) On desktop, right-click "Network", then click "Properties" (Figure 1-1).
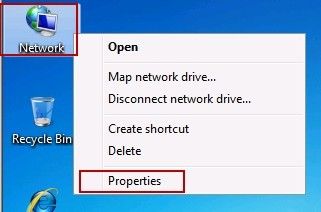
Figure 1‑1
2) In the popping up window, click "Local Area Connection" (Figure 1-2).
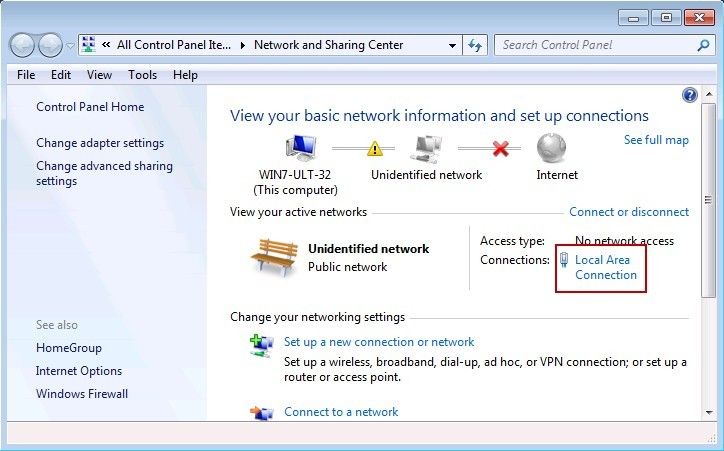
Figure 1‑2
3) In the popping up "Local Area Connection Status" dialogue box, click "Properties" button (Figure 1-3).
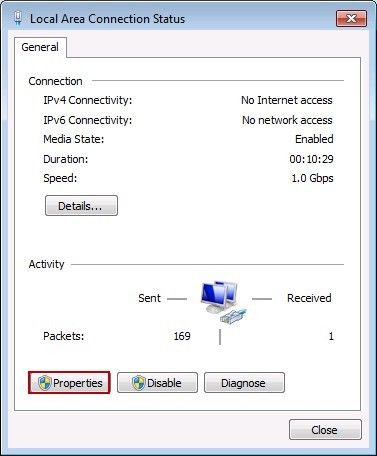
Figure 1‑3
4) In the popping up "Networking" dialogue box, click "Internet Protocol Version 4 (TCP/IPv4)", and then click "Properties" button (Figure 1-4).
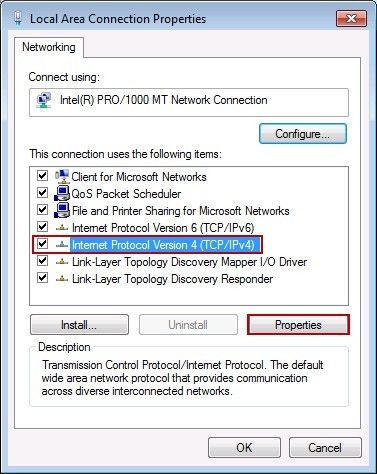
Figure 1‑4
5) In the popping up "Internet Protocol Version 4 (TCP/IPv4)" dialogue box, select "Use the following IP address" radio button, in "IP address" edit box type the IP address of the server (such as 192.168.1.147); obtaining Subnet mask automatically; in "Default gateway" edit box type default gateway (such as 192.168.1.1) (Figure 1-5).
Select "Use the following DNS server address" radio button, in "Preferred DNS server" edit box type DNS server address (such as 192.168.1.1), then click the "OK" button (Figure 1-5).
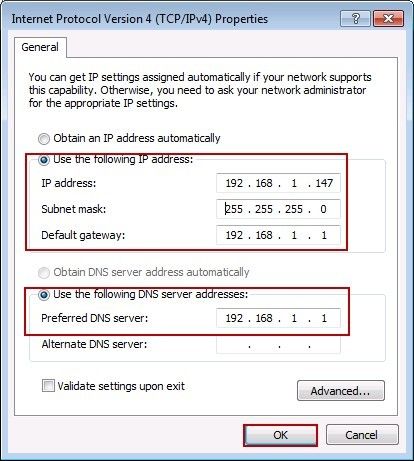
Figure 1‑5
6) Setting up static IP address has been done.
Related: